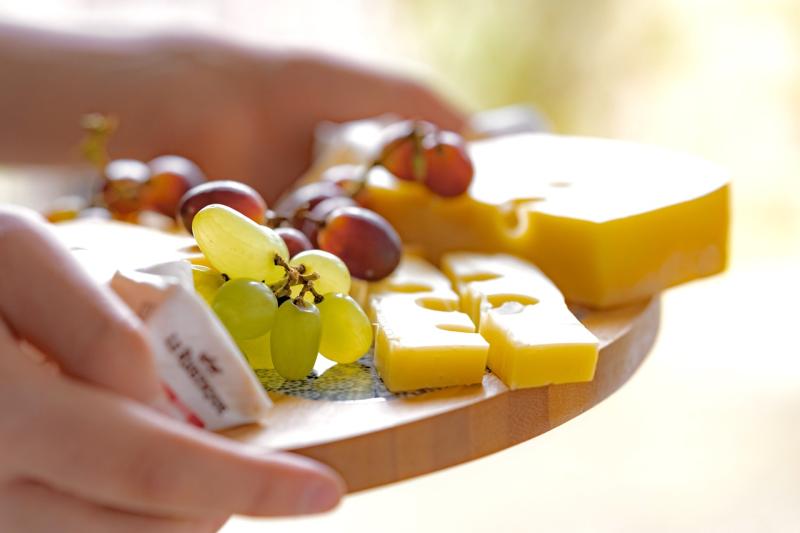
Gather Your Cheese Selection
When it comes to choosing cheese for your cheese board, it’s best to have a variety of different texture and flavor. A good way to get the best of both worlds is to pick three different types of cheese to offer your guests, such as a soft cheese, a semi-hard cheese and a hard cheese. Here are some of our top picks for the perfect cheese board:
- Soft Cheese - Brie, Camembert, Ricotta
- Semi-hard Cheese - Gouda, Manchego, Pecorino
- Hard Cheese - Cheddar, Parmesan, Gruyere
Remember, the goal is to have a variety of cheeses that have different textures and flavors, so don’t be afraid to try something new!
Assess Your Cheese Board Size
The size and shape of your cheese board is one of the first things you should consider when creating a perfect cheese board. You want your cheese board to be large enough to fit all of your chosen cheeses, condiments, fruits and crackers, but not so large that it looks sparse and unappealing.
Therefore, it’s important to assess your board size and plan accordingly. Many prefer to choose one long, rectangular board or multiple smaller boards to arrange their cheese on. The smaller boards can be easily moved around so you have more versatility when creating the perfect cheese presentation.
Some prefer to go all out and show off their creative presentation by arranging the cheeses and accompaniments in stunning patterns on a large, round board.
Whether you choose one large board or multiple smaller boards, don’t be scared to experiment and find the size and style that works for you.
Consider Accompaniments
When building the perfect cheese board, remember to think about how the other ingredients will work with the cheese. You'll want to maintain a balance of flavors, textures, and colors. Some ingredients that pair well with cheese are:
- Fruit: Dried and fresh fruits are both a great way to add a touch of sweetness to the board. Try to select a sweet, mild, and acidic fruit such as apples, pears, grapes, and dried fruits.
- Nuts: Nuts are a great addition to any cheese board! Not only do they add a crunch, but they also provide a salty and roasted flavor. Try toasted nuts such as almonds, peanuts, pistachios, and walnuts.
- Bread and Crackers: Serve your cheese with a variety of crackers and breads. Choose traditional crackers, hearty grain crackers, and sliced, crusty bread.
- Savory items: Balancing out all of the sweet flavors, add some savory accompaniments such as cured meats and olives.
- Honey and jam: Perfectly pairs with your cheese board. A honey with a hint of spice is especially tasty!
Once you have added these accompaniments to the board, feel free to add anything else you like! Fresh herbs and edible flowers are always a beautiful addition to any cheese board.
Think About Visual Appeal
Creating a visually appealing cheese board is one of the key components that make it inviting and fun to assemble. Select different shapes and sizes of cheeses to add dimension and balance. Slice a few of the cheeses into various shapes and arrange them so they are easy to pick up with crackers or small forks. Add different hues of fruits, vegetables, and nuts to provide vibrant colors. Lastly, use small dishes of jams and jellies with a cheese knife or two arranged amongst the platter.
Not only will a visually appealing cheese board help create an inviting atmosphere, but it will also be a talking point during your festivities.
Choose the Right Knives
One of the most important steps in creating the perfect cheese board is choosing the right knives. The right knives will help you to easily cut the different types of cheese without breaking them.
You'll want to start with a sharp knife for hard cheeses, such as Cheddar, Gouda, and Parmesan. Look for a knife with a thin, pointed blade that is designed to cut through hard cheese without crumbling it.
Again, for softer cheese, such as Brie and Camembert, you'll want a knife with a thicker, curved blade. This design helps to easily scoop up the cheese without mangling it.
Finally, for blue cheeses, such as Stilton or Gorgonzola, you'll need a semi-sharp knife. You'll also need a fork to help you break apart the cheese.
Now that you know the different types of knives you need, you can start creating the perfect cheese board.
Serve Cheese At The Right Temperature
Creating the perfect cheese board means more than just arranging your cheeses in an alluring way – you must also serve them at the right temperature. All cheeses benefit from being served at room temperature, which means removing them from the refrigerator 30 minutes before they’re consumed. If a particularly hard cheese is served too cold, it will be difficult to cut and can prevent full appreciation of its flavor.
When it comes to creating an impressive cheese board, always err on the side of a slightly warmer temperature. This often means the cheese has to come out of the refrigerator earlier – up to one hour before it will be consumed. If you anticipate the cheese board to be consumed over an extended time period such as an hour or two, then be sure to keep the board at a consistent temperature using a warming plate or similar gadget.
By taking care to serve the cheese at the perfect temperature, you can make all the difference for your guests’ tasting experiences.
Be Creative With Presentation
Having a cheese board can be a fun and creative way to discover different types of cheese. To create the perfect cheese board, get creative with the presentation. A few ideas to get started with:
- Choose different shapes and sizes of wooden boards or slate tiles
- Arrange the cheeses, crackers and accompaniments artistically
- Add edible garnishes, like sprigs of herbs, sliced fruit, nuts or edible flowers
- Add decorative touches, like small bowls of olives, marinated peppers, and your favorite condiments
- Be mindful of color for the presentation – mix and match to make it extra special
- Don’t forget to serve your cheese board with delicious wines – white and red, to add a pop of color, and bring out the flavors of the cheese and accompaniments
Creating a cheese board can be a fun and easy way to entertain. Take the time to make it look beautiful and your guests will be delighted. Try out a few new presentation ideas and get creative!
Utilize Unconventional Garnishes
One way to take your cheese board to the next level is by adding some unique and creative garnishes. Include unexpected elements such as fruit compote, cured meats, seasonal vegetable spreads or a selection of nuts. This is where you can let your imagination run wild! Top your board with fresh fruit, herbs, edible flowers, or a drizzle of honey for added color and flavor. A few unconventional accompaniments can really elevate the presentation and add a wow factor to your board.
Think outside of the box and get creative when choosing your garnishes. Incorporate some luxury items like specialty olives, artisanal jams, honeycomb, pickled vegetables, or candied pecans. Or you can take a more savory approach with cured meats, spiced nuts, roasted garlic, crushed red pepper flakes, or truffle mustard.
Whether you decide to include savory, sweet, or both, selecting garnishes that look as good as they taste is essential when creating the perfect cheese board. Be generous and don’t be afraid to get creative with the garnishes. Have fun and let your imagination be your guide!
Use Condiments for Variety
Adding a variety of condiments to your cheese board is an easy and effective way to create a delicious, diverse dish. There are a wide array of different types of condiments that can accompany a cheese board, from flavored honeys to chutneys. Choose some that complement the types of cheese you’ve selected, as well as some that provide contrasting flavors. You can also select condiments that offer different textures such as crunchy crackers or crunchy pickles. Adding a variety of different condiments to your cheese board will keep your palate engaged throughout the meal.
Prepare and Store Leftovers Safely
You’ve created the perfect cheese board, with all the delicious accompaniments to make it a beautiful presentation, but what do you do with the leftovers? You’ll want to be sure to store them safely and properly so that you can enjoy the remaining food. Here are some tips for preparing and storing your cheese board leftovers for future use.
Preparing Leftovers
- Gently remove any decorations, extra ingredients, or garnishes with a spatula before putting your cheese board away.
- Be sure to store the cheese, fruits, and accompaniments separately. Dairy and other perishable foods should be kept chilled.
- Wrap each item securely with plastic wrap or aluminum foil. This helps to keep air out and prevent the food from drying out. Also, be sure to double-wrap delicate items such as blue cheese or camembert.
- Make sure to label and date all leftovers so that you know when they were stored.
Storing Leftovers
- Whenever possible, store leftovers in an airtight container. This helps to preserve the food and keep it fresh for a longer period of time.
- Cheese can also be frozen, but this will affect the texture and flavor. Make sure to wrap it in plastic wrap first to prevent freezer burn. Before serving, thaw it in the refrigerator overnight before serving or enjoy it as is.
- When storing fruits, nuts, and other accompaniments, make sure to keep them in their original packaging or a separate airtight container.
- Monitor for any signs of spoilage, such as mold or changes in smell or texture.
By following these tips, you’ll be able to store and prepare your leftovers safely so that you can enjoy them later on.